Hello and welcome to my blog. What I'm doing here is documenting my personal expression of "hands-on history" from a craftsman's perspective. I've been on this path for a large part of my life and it's taken me to some interesting and challenging places. I hope to share the processes and the historically inspired objects I've crafted along this journey into our past. This adventure has deepened my appreciation for past craftsmanship and the intelligence of common place things in Early America. Besides, now I have all this cool stuff to play (teach) with.


Jim Miller


Monday, January 31, 2011

Fishing for History or Trying My Hand at 19th Century Angling

     I wouldn't call myself an avid fisherman although I have fished off and on all my life. I had an old bamboo fly rod thrust into my hands long before I was a teenager. My father, on the other hand, was an avid fisherman, so I can thank him (the thruster) for getting me started. A few years ago I decided it was time to get back into it but this time with a different take. I thought to myself, what was it like to be an angler in the early to mid-19th century? Could I possibly recreate that early tackle and learn to use it effectively?
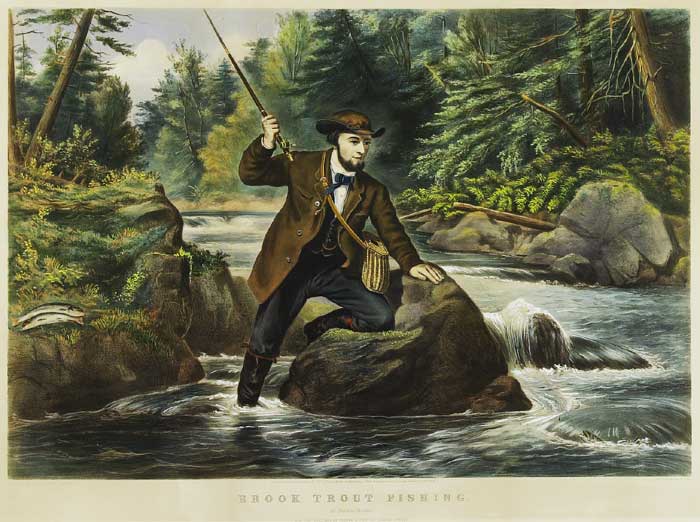
Currier and Ives
1860's Trout Fishing
Check out that suit !
     This is a fun project to talk about as a lot of us have had the chance to go fishing. I also think it's safe to assume there's a broad base of similar experiences out there. People like myself, who are more than a little bent on history, might even be curious about the ancient beginnings of angling. There seems to be at least a couple of us out there who even want to "experience" fishing at a pre-industrial , low-tech level. I find this quite comforting that I'm not alone but for the time being, we early angler types are few and far between. Since recreating period angling is a quiet and personal sort of experience, it might be a little harder to sell it as an option to the warrior / reenactor  crowd. I did uncover a lot of information and sources to help me build my period fishing  kit, so I think it's within the grasp of the hobby-historian to do this.

      First things first, I wanted to know who out there is, or has been, fishing in a 19th century fashion. I stumbled on Hank Trent's website Fishing Rod . Hank had put together a pretty convincing impression of an 1860's angler for a one time Civil War reenactment event back east. His site had some basic information and lots of primary sources he had used to pull it off. It was a good starting point but I wanted to go a little further. I wanted to scratch build my own authentic tackle and use it to catch fish. A little later I found Paul Jones and his Historic Angling Enterprise . Paul's site is full of goodies and getting better all the time. He is a great resource for things like horsehair and silkworm gut line and he also has period appropriate flies. His booklist includes some of the best titles on the subject. Paul even encourages people to make their own hooks and sells what you need to do it.

 1850's American Angler
image courtesy
The Daguerreian Society
     I continued my internet quest for information on early tackle and made some great discoveries. The American Museum of Fly Fishing is a must visit. I wish I could see their collections in person but they do at least feature some of their exhibits on line. There are also many sites that focus on Angling History. I found Dr. Andrew N. Herd's site to be quite helpful,  A Fly Fishing History and I stumbled on a great article on gut line at Midcurrent. Little by little, I was amassing the parts of the puzzle but I still lacked a clear plan.

     One name that I kept coming across in my research was Thaddeus Norris, sometimes refered to as the father of American Angling. When I learned that his "The American Angler's Book" was reprinted by Derrydale Press, I couldn't wait to get my hands on it. As I suspected, this would become my bible and an invaluable aid to formulating my strategy for the project. Honestly, I couldn't get enough of it. At the time this book was first published in 1864, most of the literature on angling, up to that time, had come from England. The influence of the English style of Angling on the Early American fisherman was undeniable but Thaddeus wanted to celebrate a distinctly American version. What gave me a charge was that Norris made his own rods and promoted that very self-made fisherman I wanted to become. His detailed descriptions of tackle and how to make it was just the ticket I had been looking for. This was going to be fun but there was still a ton of work to do.

Thaddeus Norris
aka Uncle Thad
The Father of American Angling

      What I was looking for beyond Norris' book were pictures of actual surviving examples of early 19th-century tackle to study. Hopefully this would help me decide what I needed to reproduce and what I could buy. I thought that antique tackle auctions might be a good place to start and I was right.           Mullock's Auctions  in the UK is an amazing resource for early gear. You will see some of the rarest of reels, rods, creels, flybooks and all kinds of scarce period fishing minutia. On this side of the pond you have   Lang's Auctions although I found access to their past auction items is limited unless you're willing to pay.

Mullock's Catalog Cover
courtesy
Mullock's Auctions UK
     In the collector's books department I found  A.J. Campbell's book, "Classic & Antique Fly Fishing Tackle" is full of eye-candy and great information. I also found a great site that helps collectors ID old rods, with some classic examples worthy of study. I know that there are tons of books and resources out there but this is what I found to get me started

     . My final decision on a reel was to go ahead and  purchase an antique. I was looking for a plate mounted, small brass winch, around 2" in diameter, if I could be so lucky. Something mid 19th-centuryish would be fine, since it appeared these cheaper, simple little reels were produced for at least 50 years. Well, lucky I was, thanks to Ebay, a little prize reel  from an overseas dealer, was mine for a price. It turned out to be not quite ready for service until I unpeened the pillars, tore it apart and rebuilt the ratchet. But hey, the price was right and I was off and running. Before I launched into crafting the rod ala Norris, I decided to focus on a creel.

On the Mokelumne River, Calaveras County,
with my creel on my hip and
net on my backl
Photo Andrew Quist 2010
     From what I could gather, the classic creel of the early to mid 19th-century would be commonly made of split or whole willow not wicker. The hole on the lid would be centered and the classic body shape could be what we call "pot-bellied". I'd never made a basket before but what the heck, this could actually be fun. After surfing around on the net for a basketry source, I found Bonnie Gale and her English Basketry Willows. What a lucky find. Ms. Gale not only had the correct willows for sale but she had a pattern for a creel !! With a little tweeking, the pattern worked for me just dandy. Norris said that your creel should be large enough for a bottle of claret! I just love this guy.

My rod with the English reel and my fly-book
photo Andrew Quist 2010
      No more procrastinating, it was time to craft the rod. Norris recommended starting with square stock wood strips for the rod's sections and shaving them round but I chose straight-grained round dowels instead. I decided to make it a three piece rod that would finish out around 12'. With the master's guidance, I made the butt section out of 4' of ash, the middle section out of 4' of hickory and the tip 4' section would be a combination of materials. That final section started with hickory, spliced to rent (split in 4 sections) and glued bamboo, spliced to a final few inches of solid bamboo. All the sections were tapered according to Norris' plan. I made all the ferrules from flat brass sheet and left the wooden spike of the earliest styles. All the guides were to be floppy brass rings that I had to hard-solder together. The butt section was shaped in the classic cigar-shape swell near the base. I inletted a section near the base for the reel plate and slipped on the sliding brass rings that I had made to secure the reel. I decided to dye the butt and middle sections with India Ink and leave the final section natural. With the rod complete, stained and fitted together, I lashed all of the guide rings in place with silk thread and gave the rod several coats of varnish. It all seemed a "little" homey but I think that Thaddeus Norris would have approved. It was a whippy little devil too. That was a discovery right there. Not at all like a modern rod.

     The typical fly line of the period was made of braided silk, usually in a tapered form. With the current mainstream interest in classic early 20th century tackle, they are still being made but the new lines are quite pricey. I decided on an affordable vintage line that I restored with a mixture of linseed oil and varnish.The line that Norris recommended was a combination of horsehair and silk. That wasn't going to happen but at least I was close. Silkworm gut leader material is unfortunately obsolete but you can still get it from people like Historical Angling Enterprise or take your chances on Ebay. It was in use until after WW II, when Nylon line began to take its place.  Gut is amazing stuff as it has to be soaked before it's in a usable state. I keep mine wet with little baffles of damp felt, layered in an old shoe polish can. To store my flies, I created a Fly Book based on original examples I had studied. It's literally a leather book with parchment ( I substituted Tyvek ) pages that have little envelopes to keep the flies in order. The flies are tied on a blind eye hook (no loop) and snelled with a short piece of gut line. With the snoods coiled around the fly, they tuck neatly into the book. I'll get into the period flies shortly. Lastly, I had to come up with a proper net to land those luckless fishies. I steam-bent a strip of oak into a circle and turned a wooden handle with brass fittings to attach to the loop. I had an old cotton net that belonged to my Dad and since it was still serviceable, I put it back to work on my new/old frame.

Another view of my fly book,
rod and an assortment of
snelled flies
photo Lindy Miller 2011
Cowdung Replica with Period Illustration
courtesy
Fly Anglers on Line
My Cowdung Replica After a Few Tmes Out
     Fly tying is an artful craft that when pursued seriously, demands both intense study and strict attention to detail with the highest level of commitment of both your time and energy. All I wanted to do was create some accurate, historically-based flies that hopefully might actually catch fish. As that fly-fishing kid, I had used an old Herter's Fly-tying Kit to make a few flies. I can't even remember if they caught any fish at all . The amazing thing was that I still had the vice, pliers and the "How To" book. At least my primitive tools gave me something to build my new tying kit on.  In Norris' "The American Angler's Book", there is a chapter on recommended flies with suggested materials, so I wasn't at a complete loss and had somewhere to start. Then I found Fly Anglers on Line and their Archive of Old Flies. They have preserved many recipes and show a photo of the reproduction fly next to the original period illustration. Way cool and very helpful. After my wife bought me new tying materials and I scored some vintage blind eye hooks, I decided to wade in. I found that most of the 1860's flies I studied, turned out to be wet flies. Wet fly fishing appears to be the ancient style that travels back in time to the very roots of angling when some Macedonian first tied feathers on a hook. The period patterns I decided on were , Yellow Sally, Red Hackle, Jenny Spinner, Coachman (not royal), March Brown, Cowdung, Bee, and Grouse Hackle. I've yet to give any of these a real test but it's been promising so far. I did catch a couple of small rainbows on Beaver Creek in Calaveras County last year on a Cowdung. This year I've  promised myself to continue in my efforts to learn from our Angling Past and enjoy my recreated gear, if I could just learn how to carry that 12' pole through the brush. By the way, I don't normally fish in costurme but it made for some fun photos.

     As a footnote to this post, I have to recommend the viewer to check out Michael Hackney & Friends. Their project to recreate the fishing gear of president Martin Van Buren was incredible. I had already created my current 1860's fly fishing tackle and even my 1830's coarse fishing version ( a future post) when I stumbled on Michael's site. You will enjoy reading about the collective efforts of several craftsmen that led to a dynamic display of replica tackle for the historic Van Buren estate. Keeping our history alive, that's what it's all about. Fish On !!

Saturday, January 22, 2011

How I Revived an Obscure Piece of Communication History and Discovered the Secret Life of Carbon Paper

     Since 1991 I've been a volunteer at Columbia State Historic Park, in Tuolumne County, California. The Park has had an active Gold Rush Living History progam since the early 1980's. I've always been an advocate for honesty in interpretation and have tried to follow that philosophy whenever I've portrayed a historic figure, be it a miner or a merchant. In a previous post, I had mentioned the "Columbia Diggins' 1852" Living History Event as an annual affair in the Park. While researching all of the possiblities for portrayals at the Diggins', it suddenly dawned on me that I had  missed one of the key players in a historical trading center like 1852 Columbia.

Yours Truly as a Forwarding Agent
Columbia Diggins' 2008
Collodion Image by Will Dunniway
      How did the merchants procure their goods ? What about the business of business, in those wild and risky times?  The answer may seem obvious today, but maybe it was different then. One shouldn't assume anything about the past until you've done your homework. What I discovered  in "A Gold Rush Merchant's Manual" by Mary Helmich and Pauline Spear was the important role of the Forwarding Agent. Think of them as the Sales Reps of their time. These guys would front for the large,wholesale traders in the major cities and by working a circuit, would travel to the outlying and sometimes isolated towns in the mining districts. As a merchant, you depended on your Forwarding Agent. He could arrange the purchase, shipping and warehousing of your goods and even sell you insurance in case of the loss of said goods. Not a bad idea when you consider how often fires swept away entire towns. I decided I needed to accurately portray this key figure in our recreated town of  Gold Rush Columbia.

      Living History is a tricky business. I personally feel the past will always remain as such and any notion of bringing it "all" back is pure nonsense. What we hopefully can do is kick that door open once in a while and invite the public to gain a "little" insight into the past through our scholarship and sensitivity. That's my philosophy and I'm sticking with it.  Since I don't do first person, I rely heavily on an accurate costume and authentic, replica props to teach with. With all that said the question remained, what did a Forwarding Agent need, to do his job in the field ?  One mysterious object that kept popping up as I did my research was something called a Manifold Writer. This little object turned out to be a great piece of communication history that had virtually fallen through the cracks. Most people have never heard of it.

Edward Kavanaugh's Manifold Writer
Georgetown University
     The Manifold Writer was a copy book used to make multiple versions of letters or notes or anything written. How was this accomplished ? Well, it was done with carbon paper, first called carbonic paper. The way it worked was so cool that I was determined to locate an original Manifold Writer, and replicate it. You've got to love the internet, when it works. I lucked out and discovered that Georgetown University, in Washington D.C., had an original Manifold Writer in their library archives. It was owned and used by Edward Kavanaugh around 1832. Mr. Kavanaugh had been a State Legislator from Maine, a U.S. Representative, the Governor of Maine and finally a diplomat to Portugal. Whew...that's a life ! No wonder they kept his copy book full of his letters. I contacted the University and was thrilled to learn that they would photograph all of the parts of the Manifold Writer for me, for a small fee. The fact that it was a complete, intact example  gave me the opportunity to produce an accurate replica. So how about a little history and insight into how this thing actually worked ?

Original Ad for Wedgwood's Manifold Writer
courtesy of
scienceandsociety.co.uk
     It all started in 1806, when Ralph Wedgwood patented the Stylographic Manifold Writer. It's intent was to help the blind to communicate. Ralph's idea was to make it possible for someone, sighted or not, to write a letter without the usual quill pen and ink. This was accomplished with the use of cabonic paper that was saturated with wax and pigment. What you had was a bound book of tissue paper pages. You would insert a sheet of this new carbon paper that was coated on both sides, under the tissue page. Under the carbon paper, you inserted a plain piece of letter paper and under that a thin plate of metal for a backing. With a special stylus that had a smooth, blunted end, you proceeded to write your letter on the top tissue paper page. By pressing down with the stylus, the pigment on the top of the carbon paper would transfer the writing to the back of the top tissue (readable through the tissue) and transfer the writing from the back of the carbon paper, to the blank letter paper. I know it might take a moment to understand this but it was revolutionary in its day. It was possible to make several copies, at the same time, by repeating the combination of carbon paper and blank letter paper, in multiples. You also ended up with a copy in the bound book of tissue paper. In all the examples of original Manifold Writers that I surveyed, these bound letter copies were usually all that remained. One more thing that the Kavanaugh example had that made it so special was a separate cardboard shield that kept your hand from making an imprint. It also had guide strings to help you write in nice straight lines. Way cool !

My replica, showing copy book, carbon paper in
protective paper folder, metal backing plate,
cardboard shield with guide strings and sylus.
photo Lindy Miller 2011
      In order to make a credible replica, I had to do a crash course on bookbinding. Both  ehow.com and instructables.com  were good places to start. I found some very thin calfhide, period looking marbled papers and thick chipboard for the covers. The hardest thing was locating a close substitute for the original tissue paper leaves. The best I could find was tracing paper bound in a pad, for artists. Luck would have it, carbon paper can still be purchased, but it's really getting hard to find in this digital age. Two sheets of it, carefully glued back-to-back, recreated the original double sided version. Sewing the signatures of tracing paper together, with waxed linen, took some time. The paper was easily torn after I punched the holes for the thread, so I had to be very careful. I turned the walnut handle for the stylus on my lathe and crafted a metal tip to match the original. The photos from Georgetown were high resoulution and I easily copied the label from Kavanaugh's original. The label is in three languages, a reminder of the popularity of such things in the 19th century.

Our original 1855 Manifold Writer
photo Lindy Miller 2011
     Another little tidbit that I discovered about the Manifold Writer was its place in our history. Did you know Ulysses S. Grant wrote the terms of surrender at Appomattox on one so Lee could have a copy, or that Mark Twain used one to copy his thoughts for us to discover later?  The use of the Manifold Writer almost spanned the entire 19th century. Carbon paper finally came into its own when the typewriter was perfected in the 1870's. Heck, I used the stuff in the early 1960's, in typing class, but all that remains of it today, is a saying in our common language. People sometimes still call it a "Carbon Copy" or CC when they refer to anything duplicating an original. One final note, my wife and I were lucky enough to later find and purchase an original 1855 Manifold Writer which I've pictured here.

Monday, January 17, 2011

My Great Banjo Adventure or How I Crafted a Thoughtful Piece of Musical History

     Sometime in the mid 1980's, I was reading a copy of Smithsonian Magazine and a picture of an early Minstrel Banjo grabbed my attention. The banjo was like none I had ever seen. I didn't play the banjo and really hadn't paid that much attention to them but there was something about that primal version, with its "difference", that got me. Around 1986 I read about a major banjo exhibit at MIT called "Ring the Banjar". I sent for the exhibit catalog and began to learn about the banjo's history and its evolution. In the catalog there was a photo of a Boucher Banjo from ca. 1845. It had a double-head design that really surprised me.

Foxfire's Sweeney Banjo and
Ring the Banjar! Catalog
     A little while later I discovered the Foxfire books by Eliot Wigginton and his students.They are an amazing resource for Appalacian Culture, past and present. In Foxfire 3, there was considerable information on Banjos, mostly from a home-grown perspective. That's my cup-of-tea ! On page 165 there is a picture of Mr. Wigginton holding an antique banjo, identified as "The Sweeney Banjo". The banjo's design reminded me a little of the Boucher Banjo at MIT. On the same page are some sketches of the banjo with descriptive text, with more photos on the following page.  This so-called Sweeney banjo had that primitve appeal and I was inspired. I made up my mind to try and copy it. With no real knowledge of how a banjo should be made, I plunged ahead. This was sometime around 1989.
  
     I had a nice plank of walnut that would suffice for neck material. I improvised a tube-like box to serve as a steam chamber for softening a strip of oak that would become the hoop. I knew enough to thin the ends of the oak strip for a lap joint. That lap would eventually be tacked together with copper tacks.With no real knowledge of scale, I traced out the neck design, based solely on the Foxfire pictures. With the neck carved to form, I started on the hoop. The hoop was bent around a large can I had, then the ends were tacked together. It was close to round. This was a primitive banjo after all.

My first Banjo with present owner
 Floyd Oydegaard
     As parts were starting to come together, I realized that finding a skin for the head might be a problem. Luck would have it, my neighbor Tony Sutton had just returned from a successful deer hunt. That luckless doe would soon be immortalized as a banjo head and remembered long after those venison steaks disappeared. So there it was, my first banjo. With a tacked on, scraped deerhide head and whittled pegs, it sure seemed authentic, except for a set of nylon guitar strings from the local music store. I wasn't even sure it was playable although it sort of sounded right. At this point in the adventure, my banjo was demoted to a wall hanger, as I had no idea how to play it. Years later a musician in a music shop, tried to tune it and managed to play part of a song. He thought it was interesting, and not the worst homemade banjo he had seen. I was "sort of" encouraged but back on the wall it went.

     For some reason that crude banjo stayed with me through life-changing events. It eventually ended up decorating the wall at the Carpenter's Shop that my wife Lindy and I opened in Columbia State Historic Park in 1998. It was a topic of converstation to many visitors and occasionally a musician would try to play it. My wife wondered why I never really learned to play and wouldn't accept my excuse that it was the banjo's fault. Being the practicle and generous person she is, she gifted me with a Minstrel Banjo kit from Bob Flesher .

My Flesher / Boucher Banjo
     So now it was time to do my research and build an authentic replica of an early banjo. I purchased a copy of "America's Instrument" by Philip F.Gura and James F. Bollman and began to read. I think this is the best book written on the banjo, in 19th century America. The book is filled with photos of the rarest and earliest banjos known to exist.  Bob Flesher's kit claimed to be based on an original Boucher but I soon discovered I had my work cut out for me. In the end, I achieved a more Boucher-like instrument than my first banjo, but not quite a replica example. For the moment, that was fine. After all, it was very playable and had the "look" I was after. Along with the kit came an instruction book on playing in the Minstrel Stlye. I tried to learn, I really did, but the more I worked at it the more frustrated I became. Maybe I just wasn't cut out to be a musician.

Ed Sims, Banjoist / Bonesman
     My frustration ended when I met Ed Sims in June of 2002. Ed had come to Columbia to participate in the annual living history event known as" Columbia Diggin's 1852". In keeping with the spirit of an authentic Gold Rush camp , Ed had brought his Minstrel Banjo to add his music to the historical experience. He kindly played a couple of tunes for me in my Carpenter's Shop and I was stupified. I had never had anyone play a period piece competently, on a period style banjo for me. The amazing part was that Ed was self-taught. Eureka !! This could really happen for me and Ed promised to help. He did more than help. Ed sent me taped music, played at a pace I could follow and page after page of tabbed period music. I actually began to get it and practice payed off. Besides a great teacher, Ed is a great historian and early banjo advocate. Through his guidance, I even began to connect with the early banjo community. In the world of banjos, the Minstrel niche is miniscule but alive and well. I continued to practice and learn about early banjos.

My sketchbook and the Exhibit Catalog
     Towards the end of 2003, I heard about an exhibit at Katonah, New York called "The Birth of the Banjo". It was rumored to include the largest collection of antebellum banjos ever assembled. Equally astounding  was a simultaneous banjo exhibit on Long Island at The Museums at Stony Brook. Ed and I had no choice, we had to go and go we did. January 2004, we were in Katonah, at the Museum of Art, surrounded by the most amazing collection of early banjos and related material I could have imagined. Being in the presence of these rare survivors swept away all my book learned notions about design and function. In the round, these banjos radiated their artful intellegence and the ingenuity of their designs. The first thing I noticed was that many had a lightness and even an airiness about them. Not at all clunky like my pseudo- Boucher. The museum did not allow any photography so I came prepared to sketch. I wanted to collect as much info. as I could glean from this opportunity. My focus was the two Boucher Banjos on display. One was the classic scalloped hoop version and the other a double-head. I couldn't get enough. I sketched and sketched. These Bouchers were speaking to me and I was listening.

"The Banjo Player" by
William Sidney Mount
courtesy Banjo Clubhouse
       Later that day I had the opportunity to meet Jim Hartel, one of the Country's best historic replica banjo builders. What a great guy and I got to see some of his work as well. Just before the Museum closed we chanced a meeting with Peter Szego, a guest curator of the show. Many of the banjos belonged to Peter. Lucky guy. He was curious about these banjo geeks from California. Just before everyone was about to leave,somebody asked Peter if he would play something for us on the replica minstrel banjo that was available for visitors to handle. Peter decided to play Circus Jig when all of a sudden my friend Ed produced two sets of Bones. Besides a great banjoist, he's kick-ass on the Bones. Peter played away and Ed rattled his way into getting us invited to dinner. My buddy had planned this all along and the best part was that it worked! We hit it off with Peter and his friends and promised to keep in touch. The next day, during a snow storm, we took the ferry to Long Island.  What we discovered at The Museums at Stony Brook, (now known as The Long Island Museum of American Art, History and Carriages, ) was a collection of collections, but we managed to keep our focus and finally found the banjo exhibit. There weren't as many examples of early banjos as Katonah but still worth it. The highpoint for me was to stand in the presence of William Sidney Mount's painting "The Banjo Player", one of the most recognized banjo paintings in the world. I was amazed to see that it was life-sized. Unbelivably cool. Under the painting, in a display case, was a Boucher Banjo of a third design. I got busy sketching. After this great adventure of banjo discovery, Ed and I talked all the way home about the possibility of my building an accurate copy of an original banjo. The problem was, which one ? I'll bet it will be a Boucher !
    
Some of the data collected by Ed Sims
     A short time after returning home, a friend of mine showed me a copy of The Magazine Antiques. It was the December 2003 issue and featured a great article about American Banjos. The article was written by Peter Szego and Robert Shaw to promote the exhibit at Katonah and the appreciation of early banjos. On page 88 there was a picture of a double-headed Boucher that I hadn't seen before. The neck was birds-eye maple and the hoop was birds-eye veneered. I thought to myself, this is the banjo I want to build. The best part was that it was owned by Peter. My friend Ed agreed that it would be great to copy this rare banjo if Peter allowed us to study it in detail. I promised Ed, that if he did the survey of the original, I would build one for him as well as me. That's exactly what happened, Ed went back east, armed with my instructions and Peter Szego graciously allowed him to document this beautiful banjo. Now it was up to me to do the rest.


      As with many of the projects I've undertaken, there is considerable research before any actual work. I needed to do a lot of digging and experimenting, before I could gain the confidence to pull this one off. Like, practicing hammer veneering with hot hide glue.Yikes ! As always, other people were involved, who kindly shared their knowledge and expertise. George Wunderlich  and Jim Hartel were both extrememly helpful in explaining their views on the mysteries of Boucher's construction methods, like the offset dowelstick and three piece neck. Both of these guys have handled enough original banjos to become leading authorities on the subject. 


     Gathering the neccessary matierials was next. Curly Woods of McKinney Texas turned out to be the best source for select birdseye maple. Pricey but worth it. Certainly Wood of East Aurora, NY supplied the maple veneer. These banjos deserved nice round hoops and I decided to let the experts do the bending. Sean McGinnis at Cooperman, in Bellows Falls, VT came to the rescue with two beautiful, white oak hoops, built to my specs. I decided to use existing violin pegs that could be altered to match the originals. I located a Hill style peg from Dov Schmidt of English boxwood. I eventually dyed them with India ink to resemble ebony. In order to have the bracket shoes reproduced, I carved a model to be sand cast by Roller Foundry of Missouri. An anonymous donor gifted me with replica Boucher wingnuts. That I am grateful for. My friend Nick Kane traded me some rosewood for the nuts, tailpieces and peghead buttons.  Last but not least, my friend George Cantrell, a great blacksmith, helped by bandsawing out the sheet steel needed for the tension rings.

The Classic Boucher Peg Head
     The rest was now up to me. The most daunting challenge was to keep tabs on the quirkier details of the original banjo. As I crafted my replicas, I didn't want to "fix" the parts of the original that seemed a little off. I wanted to celebrate them in my work.  In the 1840's, Boucher banjos were being cranked out to fill  the growing demands of the public. Surviving examples rarely meet our criteria of finely crafted instuments. Still, their form is iconic and an important part of the banjo's evolution. That is why I've been drawn to them ever since I saw the first one. In 2006, I finished the two banjos and fulfilled my dream to craft a thoughtful piece of musical history. Heck, it only took 20 years!! I will always applaude the good and talented people who are trying to make a living at recreating early banjos.

Finished Double-Headed Boucher Banjos
Front View


Rear View

Monday, January 10, 2011

Recreating the California Bear Flag of 1846


     When it came to this particular project, I think the making of the flag was the easiest part of the process. Even though I thought I knew a little about the original Bear Flag's origins, nothing could prepare me for the convoluted, contradictory and confusing history of its creation and possible creator(s) that my research uncovered. In order to keep this blog in the spirit of fun and discovery, I think it's best to start with an accurate but brief description of the events leading up to the flag's creation. What will follow is a pared down version of the original flag's long journey, its return home and it's eventual demise. Intersperced, will be lists of claimants who wished to share in the fame of its creation and an amazingly creative collection of what said claimants felt the original flag was made of. Finally, I will reveal my choices that led to what I feel is a viable replica of the lost original.

1890 photo of original Bear Flag from Barbara Warner's Book
      I would like to say that if I had stumbled onto Bill Trinkle's virtual Bear Flag Museum http://www.bearflagmuseum.org/ earlier, it would have saved me a lot of grief and saved Patricia Keats of the Society of California Pioneers http://www.californiapioneers.org/ a lot of paper. Mr. Trinkle's site is an incredible repository of Bear Flag history and well worth a visit to peel back the layers of stories regarding our State's banner. Patricia Keats is the Director of the Library at the Society of California Pioneers and without her help, my project would have never progressed. She generously copied and shared many rare documents that helped me chart the risky waters of our state flag's often muddied history.

     The original Bear Flag was constructed sometime between June 14 and June 17, 1846 and was intended as a statement of revolution against the ruling Mexican authority. War between the U.S. and Mexico had begun and the once welcomed settlers, many of them Americans, felt compelled to take action. They truly believed they were about to be expelled from their homes. On June 14th, they seized the town of Sonoma , which at the time was the military center of Northern California. Their bloodless takeover was so successful that they spontaneously decided to declare California a "Republic". Every new republic needs a flag and so it came to be. The "Bear Flaggers" proudly raised their new flag in the Plaza of Sonoma and there it flew until July 9, 1846. The flag's basic design was a rectangle of natural cotton cloth with a red stripe sewn to the bottom. In the upper left corner was a painted red star and next to the star was a red bear, on all fours, facing the star. Under the star and bear,  the words CALIFORNIA REPUBLIC.were written in ink.

     On July 9th the Bear Flag was lowered and replaced with the Stars and Stripes by Navy Lt. Joseph Warren Revere ( yes, that Revere Family). Revere handed the rebel banner to an unamed Bear Flagger who was standing by. That person, in turn, handed it to 16 year old, John Elliot Montgomery. John worked on the ship U.S.S. Portsmouth as a clerk to his father the Commander and had accompanied the Navy squad to secure Sonoma for the United States. The Bear Flag traveled back to the Portsmouth in San Francisco bay, with the young Montgomery. From there the flag traveled with the ship, all the way back to the Boston Navy Yard and was stored away as a memento of the Mexican War. The Bear Flag movement was so ingrained into early California history that its legendary symbol was never quite forgotten by the pioneers.

 1896 Replica at Sonoma State Historic Park
     In 1855, California Senators, Weller and Gwin, requested that the Navy return the Bear Flag to California. The Navy considered the flag of no real importance to them and honored the request. The flag arrived in California in time to be in the September 9th Admission Day Parade in San Francisco. After its public showing, it was widely hailed in the press as the returned "Flag of the Pioneers". The flag was placed in the care of the Society of California Pioneers and was displayed proudly on the wall behind the bar in the Society's Saloon at its San Francisco Office. In 1890 a photograph of the fading and soiled relic was taken. Considering the historical importance of the flag, not to mention is frailty, it's no surprise that a replica was made of it in 1896 to fly in Sonoma for the 50th Anniversary of the Bear Flag Revolt. The final act of the Bear Flags physical history would play out in 1906 when San Francisco suffered its horrific earthquake. The destruction and fires that followed wiped away a lot of California's history and the Bear Flag became a memory. But wait ! We have a photo, right ? and a replica ? Yes, they survived but that's only part of the story. Starting in 1855, with the flag's return, controversy began as to the authorship of the original flag, who helped design and make it, what it was made of and if it was even the right Bear Flag. Some of the myths exist to this very day.

     I had promised to list many of the people who claimed to have been involved in the creation of some sort of Bear Flag during the events of the Bear Flag Revolt. Some disputed which one was the true or first Bear Flag or who was involved in the design or execution of the well known surviving flag. So here goes, William L. Todd, Henry L. Ford, William J. Scott, Ben Duell, Thomas Cowey (Cowan), Patrick McChristian, Granville P. Swift, Peter Storm, ____ Currie, Nancy Kelsey, Chepa Mathews, Mrs.John Sears, Mrs.W.B.Elliot, Mrs.William Hudson, Mr.J. Grigsby. Next is a list of the various materials supposedly used in the Bear Flag's creation. I gleaned these from all the accounts I found , white cotton, brown domestic, unbleached domestic, Chilean flour sack, white petticoat, manta cloth, coarse cotton, red flannel (petticoat), red flannel (man's shirt), blackberry juice-brick dust-oil, poke berries, rusty nails, Venitian red, red chalk, Spanish brown, black ink, charcoal and grease, lampblack.

Montgomery's drawing courtesy of
Society of California Pioneers
     The controversy surrounding the design of the flag that was on the pole in Sonoma, on July 9, 1846 was laid to rest in 1953, when the letters written by John Elliot Montgomery (remember him?) to his mother in 1846, were discovered at Yale University. John had illustrated two of his letters with drawings of the familiar Bear Flag up the pole in Sonoma. The same flag that he had carried back to the ship. The great California historian Hubert Howe Bancroft waded in, in his "History of California". Giving it his best shot, he felt that there was no doubt that William L. Todd was the artist who had made the flag that flew in Sonoma and was later destroyed in 1906. Todd himself was summoned to examine the relic banner and authenticate it. He declared it to be no other than the one he painted in Sonoma in 1846. He even recounted the misspelling of the word Republic. Todd had laid out the words in ink and mistakenly written Repubic. Realizing his mistake, he lettered over the wrong letters, to make the correction. This is often confusing to people today who see a double period at the end of the words, not realizing the correction. Todd made a declaration of his authorship in 1868 but it didn't end the controversy until the conclusive evidence surfaced in 1953.

     To this day, the one myth that survives, is that Nancy Kelsey was the Betsy Ross of the Bear Flag. A contemporary play has even been written about her involvement. There is a story that she might have been involved in helping Peter Storm craft a bear flag before June 14, 1846. A possible contender for the "first" bear flag, but there in no evidence that she was involved in helping create the Todd flag.

My replica
photo Lindy Miller 2011
     So, armed with the details in Todd's declaration of 1868 and the information in A.H. Greenly's article in the "Yale University Library Gazette" of 1953, "More Light on the Original Bear Flag of California", I proceeded to plan my interpretation of the original. The best copy of the 1890 photo of the Todd flag, is found on page 201 in Barbara R. Warner's "The Men of the California Bear Flag Revolt and Their Heritage". If you look closely, you can see that Todd made the first star smaller, then enlarged it. To my eye, it appears that he spilled some of the paint in three spots, two inside of the star and one on the field. I settled on the overall dimensions of my interpretation to be 58 1/2" x 37". The body of the flag would be of unbleached muslin (brown domestic). For the red stripe, I chose a lightweight wool flannel in an appropriate madder red color, suitable for a petticoat or a shirt. I carefully pieced three bits of the wool together as the 1890 photo and  '96 replica revealed. For the paint, I mixed boiled Linseed Oil with Venitan Red pigment (a common red paint of the time). In an earlier experiment, I had mixed blackberry juice, brick dust and linseed oil together just to see what it looked like. It turned out to be purple instead of the usually described red, so I decided against it.  In order to replicate the ink that Todd might have used, I had to figure out how to make Oak Gall Ink. The common ink of our ancestors, right? Not quite something you will find at Staples. After considerable testing, I finally found the perfect formula of ground oak galls, iron sulfate and gum arabic. It gave me a nice black ink that over time would fade to brown. All the parts were sewn together with linen thread and I used a hemp cord for the hoist. My dream is to someday fly my replica on the flagpole in Sonoma's plaza as sort of a final blessing.

       Now the best part of the story for those that don't know. The Bear Flag became our official State flag in 1911, so this year marks the 100th anniversary of the Flag of the Pioneers as our State's Banner. Although the current version is an "improved" facsimile of the original, the key elements remain.


Sunday, January 9, 2011

Recreating John C. Fremont's 1841 Flag of Exploration

     No matter how you feel about John Charles Fremont, the historical importance and profound impact of his Expedition Reports cannot be overstated. With the endorsement of the U.S. goverment behind them, they helped open up the West to emigration and settlement and set a standard for the multitude of guide books that would follow.

Original Fremont Flag
photo courtesy, Southwest Museum

     Some historians believe that since Fremont's expeditions themselves weren't goverment sanctioned, he couldn't officially carry the Stars and Stripes. Instead, he commisoned a personally designed flag to take its place. In actuality, personally designed flags were not that uncommon in the mid-19th century and flags with eagles in the canton were not that unique either. Whatever the reason, the story goes that John's young bride Jessie Benton Fremont, supposedly constructed the flag that accompanied him on his first expedition of 1841-42. It was planted on what was thought to be the highest peak of the Rockies (Snow Peak). Fremont wrote he "unfurled the national flag to wave in the breeze where never a flag had waved before."

     According to family history, the flag was again used on Fremont's third expedition 1845-46. Even though some historians aren't convinced that Fremont carried this flag into California, it's interesting to me that he called it the "national flag" rather than anything that would indicate that it was his personal ensign. The events surrounding what I feel is the possible continued use of this flag, are described in detail on Bob Graham's fascinating and detailed website on Fremont http://www.longcamp.com/  According to Graham, "It began on March 5th 1846 when, after having given consent for Capt. Fremont's topographical expedition to recruit his animals in California, General Jose Castro changed his mind and ordered Fremont out of the district. Fremont was insulted and refused to be driven out, removed to a defensible mountain top, raised the American Flag and grumbled." So whether or not the "American Flag", the "National Flag", or Fremont's Flag are one and the same, we may never know but if we are to inclined to give any creedence to the family lore supplied by John and Jessie's daughter, Elizabeth, then there is a possibility that this flag is important to California's history.

Time-Life picture and my work sheets
     What amazed me was that this flag still exists. For decades, it hung on the wall in the Braun Research Library at the Southwest Museum in Pasadena. The old Southwest Indian Museum was a favorite of mine since childhood and is now part of The Autry National Center's museums of western history and culture http://www.theautry.org/ . In a phone conversation with an unnamed staffer at the Southwest Museum on June 24, 2005, I was supplied with some basic information about the flag. From Master Key, vol. 26, no. 4, Fremont's Flag is described as constructed of "plain weave cotton fabric". Following that were 3 different sets of overall dimensions: 119.38cm x 211.582cm or,  47" x 83 1/4" or,  4' x 6' 8"   take your pick!  The flag is featured in many books including, "1846 Portrait of the Nation", Margaret C.S. Christman, pg 135, "A Grand Old Flag", Kevin Keim and Peter Keim, pg. 103 and an amazing detailed view in Time-Life's "The Mexican War"on page 197. Knowing that a visit to view the original flag was unlikely as it was in the process of  being conserved, I relied on the Time-Life picture for evidence of fabrics used and construction details.

     With my working knowledge of 19th century fabric, it appeared to me that the flag's stripes were not "plain weave cotton" but rather a light weight wool. The red stripes appear to be a blueish red, more like cochineal, rather than madder red. The white stripes had aged to a soft, dirty grey. The irregularity of the stripe widths give the flag a folky charm and remind me that "modern" conventions of perfection do not always relate to 19th century objects. Interestingly, the canton appears to be cotton or perhaps linen. Maybe that's what the Master Key was refering to. The bold, handpainted eagle is a wonderful rendition with its looping brushstrokes to define the feathers.The 26 stars are outlined in the same blue paint as the eagle. It's such a home-grown rendition that with a little imagination, you can see the young bride Jessie painting it with pride and affection for her explorer husband. Most historians will note that the artist substituted an Indian Calumet for the typical olive branch but will fail to mention the bloodied tallons, beak and eye of the eagle. To me the symbolism is obvious. To any native tribes that gazed upon this banner, the message was, I come in peace but don't mess with me. The last little detail was that the visible stitching appeared to be in a red thread. All in all an amazing homemade flag with an equally amazing history.

my replica, photo Lindy Miller 2011
    For my replica flag I decided on a finished size of approximately 47" x 83". The stripes would be a lightweight wool fabric that I had, which was similar to bunting. I decided to try my hand at dying with cochineal. Cochineal is actually derived from beetle bodies and is rather pricey. The good folks at Dharma Trading Company http://www.dharmatrading.com/  were very helpful with the dye stuff and info.Yup, there it came, a little bag of dead beetles. I guess I really do love this stuff. For the canton, I decided to use unbleached muslin as that's what the original may be. The painting was going to take some experimentation to reveal the possible technique used on the original. I finally settled on mixing my own paint, using Prussian Blue pigment with a shellac vehicle. It didn't bleed into the fabric and allowed me to imitate the soft brushstrokes  the original artist had used, to shade the eagle's body. All the fabric was assembled using red cotton thread with a running stitch of about 6 to the inch and flat felled seams. I tried to be honest with my rendition by copying some of the uneveness of the original but without going overboard. I'm not naive enough to believe that a stitch by stitch replica is even possible but the best crafted  replicas should be as faithful to the original as possible, within reason and within the ability and talent of the maker. I think my version turned out swell and captures the spirit of the original.

Tuesday, January 4, 2011

Recreating a 31 Star American Flag for my "Flags of California History Project"

photo Ed Sims 2004
     Where do I start?  Hmmm..... how about my birth. It's all my parent's fault for having me on Flag Day. I'm not kidding. The story about this flag starts in 2003, when I got an idea to create full size replicas of flags with a particular importance to California history. With no real idea what that would entail, I plunged ahead with the idea to use them for a lecture on important events in our State's history. The flags, as markers or witnesses to the events,would hopefully give the lecture some visual excitement. Usually when I start on a project with many parts, I choose the hardest one first, to get it out of the way. That choice, was our National Flag of 31 Stars, officially recognized on July 4, 1851 and commonly regarded as the California Statehood Flag.

    I already had a fair working knowledge of our flag's history but the materials and construction details of mid-19th Century flags, were yet to be discovered. Thank God for books, the internet and good friends.There is no getting around it, you need to do your research to do it well. Lucky for me I fell in love with a particular 31 star pattern known as the "square frame", when I first saw it on an original flag in Boleslaw Mastai's book the "The Stars and the Stripes". It was a flag pattern that was popular with ships in the mid-19th Century. If anyone has ever seen pictures of the unbelievable number of ships that clogged San Francisco's harbor during the Gold Rush, there is no doubt this style flag saw service in California.

     In 1999, my wife Lindy and I visited Sturbridge Village in Mass. and fortunately we photographed an early American flag on exhibit. Those detailed photos would be of enormous help. My good friend Derek Manov ownes an antebellum Navy Jack, which he let me handle and study. Both of these sources provided details as to stitch patterns, construction information and what materials they used. I also discovered that proper wool bunting, even a close match, was going to be the hardest to find. I'll get to that later. Dave Martucci of Washington, Maine has an amazing website http://www.vexman.net/ . with tons of information about period American flags. Dave was even familiar with the Mastai flag and was extremely helpful on getting me on track with what makes a mid-century flag unique.


photo Lindy Miller 2011
      The wool bunting issue was still unresolved until I discovered Richard Gideon of "Gideon Flags", Pittsburg, PA  http://www.gideonflags.com/ . Richard had historically correct wool bunting for sale, that was woven by Rabbit Goody of Thistle Hill Weavers. Things were starting to come together. My flag was to replicate an original that would have been dyed using natural dyes. Oh dear! This would be the next challenge. Liz Cowdery of "Linden Lane Farm", http://www.fibersofmichigan.com/ was a God send. She sent me volumes of informantion on how to dye with indigo (blue) and madder root (red). The good people at "Earth Guild" in Asheville, North Carolina http://www.earthguild.com/ supplied me with the actual dye stuffs.

photo Lindy Miller 2011


     There is not enough space to describe what it took to dye the wool but it was a project that deserves its own blog. My wife is an amazing seamstress in her own right but it was her ability to plan the lay-out of the parts, before I started the dyeing, that saved me. With 8 yards of 48" wool bunting at $35/yrd., there's no going back, once you start to cut. The finished flag would measure 6 by 10 feet, (pre-Civil War flags tended to be big) but I had to divide the wool into what would become the red, white and blue.


Photo Floyd Oydegaard
      So, with all the wool finally dyed and everything ready, I started sewing it all together, by hand, with period correct linen thread. Most of the seams were flat felled with a running stitch, about 8 to the inch. I like to call it my 62 star flag, as I had to applique muslin stars on both sides, to match through. The last thing left was to finish the hoist end with a narrow strip of canvas, as most were done at the time and bind the holes with a buttonhole stitch over a brass ring. One more thing, as a practice, I normally sign and date the replicas I make, to help future historians make sense of them. Total time, from begining to end......about 240 hours. Wow, that was a project ! Now, how about those "other" flags?