Hello and welcome to my blog. What I'm doing here is documenting my personal expression of "hands-on history" from a craftsman's perspective. I've been on this path for a large part of my life and it's taken me to some interesting and challenging places. I hope to share the processes and the historically inspired objects I've crafted along this journey into our past. This adventure has deepened my appreciation for past craftsmanship and the intelligence of common place things in Early America. Besides, now I have all this cool stuff to play (teach) with.


Jim Miller


Thursday, March 14, 2013

How They Kept Their Clays Safe, Revisited

   I recently stumbled across an interesting example of an antique tin pipe case, on an online auction. You often see late 19th and early 20th century tin cases in the shape of the clay pipes they protect, but this one was different. Not only did it safely stow the pipe but housed the tobacco as well. There's even enough room in it for a match safe which suggests it might have been a sort of traveling smoker's kit. From the construction details, I would date it early to mid-19th century.


Picture Source Online Auction

   The design is pretty straightforward, so replication was not going to be a problem. Luckily, I had a nice English clay that I purchased from Columbia Booksellers. It was one of the last Pollock pipes that he had. I decided to build my replica around this pipe instead of copying the exact dimensions of the original.


    The original case is 6  1/2" long by 2" wide. It's an elongated box with one closed end and the other with a hinged lid. Under the lid, you find a compartment sized for the pipe's bowl. Inside, at the back of this compartment, is a panel with an attached and extended tube, to protect the pipe's stem. On the top center of the box, there is an opening for access to the tobacco etc. and a hinged lid to cover it. That's pretty much it, a simple yet effective way to keep your fragile clay pipe safe and your tobacco handy.


     In some of the pictures of the original case, you will notice a fire steel and flint. At one point in this object's history, it had been repurposed as a tinder box or..................was the smoker lighting his pipe with flint and steel, hmmm?


    Here you see the beginings of my replica with the shaped and tapered tube and the above mentioned panel. I had to keep in mind that the pipe shouldn't rattle, so my dimensions were determined by the space occupied by the pipe bowl, while it rested in the tube. Do you follow ?


Photos by Author 2013

    Further along now, you see the beginings of the case body. It ended up being 7" long and 2 1/4" wide.  Note the raised ring on the right, that will be the seat for the pending lid. You can also see the tube running along the inside back.


    Now we have the end closed and we are ready to craft a hinged lid. It's starting to look like something.


    The smaller hinged lid is in place and all that remains is the large, hinged lid on top, with its latching device.


     All finished and good for service and ready to claim it's place in my growing collection of replicated odds-n-ends  from our past.

Friday, February 8, 2013

A Replica Artifact To Illuminate Young Minds

     As Education Coordinator of the Angels Camp Museum, it's my job to translate and present information about the past in an interesting and informative way. For my money, one of the best ways to enhance the learning experience is through the use of replica artifacts. While developing the gold mining lesson for our 4th grade education program, I realized that our interpeter could use a special prop to help with a critical point in the story.


Classic Combination
An Original Cap and Lamp, Circa Late 1800's
Image Courtesy lebint.com

    During the early phase of the California Gold Rush, most of the mining activity involved surface deposits of Placer Gold.  As these deposits grew scarce, some miners began exploring for Lode or Vein Gold deposits below the earth's surface. Miners literally had to change hats and that simple fact lead to my idea for the perfect prop.


A Original Cap Sans Lamp
Note the Leather Peak and Metal Part to Secure the Lamp
Image source inknown
      I'm familiar with the classic cloth cap of the late 19th century underground miner, as we have a nice example in our Museum's collection similar to the one above. We also have a rather comprehensive collection of the lamps that were worn on the front of these caps, from oil burners to later battery operated versions. After studying several examples of caps online, it seems that a generic style with a cloth covered peak, might have been most common.

My Version of a Miner's Cap and Lamp
Ready for Work
Photo by author


    Most of the original caps seem to be made of canvas or some stout cotton, in colors ranging from tan to grey or grey/green. For my version, I chose blue denim. The fixture that affixed the lamp safely to the cap's front, seems to vary more in materials than in shape.  Some examples are leather only, others are metal and some appear to be metal and composition (?). I decided to laminate several layers of leather for stiffness in making my lamp mount and riveted it to the cap's peak and body with copper harness rivets.


Original 1885 Bill of Sale
Showing Classic Miner's Cap-Lamp
Image source unknown

    Now came the fun part, the minature oil lamp, apparently (by one period account) called a "pet" lamp. These little lamps are highly collectable and well documented as untold variations exist in form and materials. To see an amazing collection, go visit miningartifacts.homestead.com . For the most part, these lamps have the appearance of tiny teapots with there spouts functioning as wick guides. They also universally have a hook device on the rear, to engage the mount on the cap.


Another View of My Cap and Lamp

      For my close copy, I went with a basic style lamp in tinplate, with a moderately long spout. The important thing to me was to create a functioning authentic version of the miner's cap, rather than an exact replica of a known example.


Photo by Lindy Miller 2013

   Speaking of function, as you can see, I couldn't resist trying the darn thing out. Contrary to my wife's opinion, having a flame coming out of your head was the least risky part of a hard-rock miner's life.


This is my 50th post and with that in mind, I would like to thank all of the viewers who have found my ramblings of some interest. I appreciate your curiosity and positive comments too.

Friday, February 1, 2013

"Flags of California History Project" Revisited One More Time

    One of the great things about pursuing historical topics is that the subjects are rarely exhausted. Just when I thought my California Flag Project was complete, I rediscovered one more historic banner, begging to be reproduced and blogged about. There are enough books written on the Gold Rush to fill a small library but near the top of the list of "must reads", is the celebrated Shirley Letters written by Louise Clappe.


The Shirley Letters
1949 Edition

     "The Shirley Letters" were first published in a San Francisco periodical called The Pioneer, starting in January of 1854. They continued as a series of 23 letters written by Louise Amelia Knapp Smith Clappe to her sister, under the pen name Dame Shirley. Louise Clappe had followed her husband Dr. Fayette Clappe to California in 1849 in pursuit of his heath and their fortune. By 1851 the Clappes found themselves in the remote mining camp of Rich Bar on the American River at the height of the "Rush". Dame Shirley's accounts of life in a mining camp, rank as one of the most incomparable documents of that rustic and wild society. Thanks to Shirley's keen powers of observation, it's also an invaluable primary resource for reconstructing mining camp culture.


An Undated Lithograph of Rich Bar
on the Feather River

     In "Letter Eighteenth", from her log cabin on Indian Bar, July 5, 1852, she writes:
"Dear M:- Our Fourth of July celebration, which came off at Rich Bar, was quite a respectable affair. I had the honor of making a flag for the occasion. The stripes were formed of cotton cloth and red calico, of which last gorgeous material, no possible place in California is ever destitute. A piece of drilling, taken from the roof of the Humbolt, which the rain and sun had faded from its original, somber hue, to just that particular shade of blue, whcih you and I admire so much - served for a Union. A large star in the center, covered with gold leaf, represented California. Humble as were the materials of which it was composed, this banner made quite a gay appearance floating from the top of a lofty pine, in front of the Empire, to which it was suspended."


The Canton Finished

      So now I had my challenge. What did Dame Shirley's 4th of July flag possibly look like?  In previous letters, she remarks about the overuse of red calico for finishing the interior walls of the temporal, ramshackle canvas and stick shanties that passed for boarding houses, saloons and restaurants. For my flag's red stripes, I decided to use classic mid-19th century cotton prints (from my wife's stash) and plain muslin for the white. To reproduce the canton, I dyed a piece of canvas light blue, simulating the faded scrap Shirley had secured from the roof of the canvas covered building named the "Humbolt".


My Version of Dame Shirley's Flag
Finished Dimensions 60" x 48"

    What set this project apart from my previous flag replications, was the lack of visual clues. In order to manage the conjectural elements, I relied on my basic knowledge of flag history. When considering the time constraint of making a flag for the occasion, I feel that Dame Shirley may have just painted the stars on the canvas, rather than sewed them on. Even though she doesn't mention the full field of 31 stars (official after July 4, 1851), a lone, gilded star would have been a little odd. For my rendition, I chose to run the painted stars in circles, surrounding the dominant "large" star in the center. This arrangement was very popular in antebellum America. Her mention of "gold leaf" came as no surprise as it's a documented fact that even in remote camps, the saddest excuse for a building, might still sport a beautiful sign, supplied by a journeyman signpainter. She no doubt secured some "leaf" from a local craftsman to decorate that dominant, proud star. I used pigmented shellac for the white stars and 23 karat gold leaf for the center star. When assembling the elements by hand, I used a running stitch and decided not to turn any of the seams. All in all, I think it turned out swell and can now takes its place in the collection as an honest reconstruction,  celebrating the lost folk traditon of homemade flags.
    

Wednesday, January 9, 2013

Sad Day for California

     It's a sad day for California, as we have lost one of our beloved promoters. Huell Howser did more  to bring our State's history and culture to light than anyone else, with his "California's Gold" TV series. I'm  really going to miss his folksy style of journalism and honest enthusiasm. He was amazing!

                                              Rest in peace.


                                              Huell Howser
                                                1945 - 2013


Friday, December 14, 2012

Historic Costume Recreations, Part 5, Some New Thoughts on a Miner's Overshirt

      When I start a project to recreate something historical in nature, I make an effort to gather as much information as I can. Over the years, I've created many different interpretations of men's mid-19th century overshirts and based on my level of knowledge at the time, some were better than others. Even though these shirts were a staple commodity during the California Gold Rush, no documented original examples of actual "miner's shirts" have surfaced. What we are left with, is the contemporary photographic record of a very popular shirt.

Classic Overshirts on the Job
image source unknown

     One of the best collections of Gold Rush daguerreotypes is found in the book "Silver & Gold" by Drew Johnson and Marcia Eymann, University of Iowa Press, 1998. I highly recommend it for anyone who is serious about studying California Gold Rush clothing.

     From Gold Rush era advertisements to personal journals, I've gleaned only bits and pieces about overshirts with few details of their construction or ornament. The best period catalog illustration with decriptive text I've ever found is the REED, BROTHERS & CO. catalog of 1853, plate 19.


From My Copy of the 1853 Reed Catalog
Showing the Miner's Frock and Descriptive Text
photos by author 2012

  
      So, even though none of the thousands of Gold Rush overshirts seem to have survived to the present day, you have to wonder, have any mid-19th century overshirts survived anywhere ? Yes indeedy......read on.

Original 1856 Overshirt
Image Courtesy Steamboat Arabia Museum
      I recommend that eveyone who is interested in mid-19th century American History visit the Steamboat Arabia Museum in Kansas City, Missouri. The museum houses the recovered cargo of a sunken Missouri River steamboat, lost in 1856. It is a rare opportunity to have a full-immersion  material-culture experience, second only to time travel, as the collection is literally a moment frozen in time. When I first visited the Museum, many years ago I was a bit overwhelmed by the scope of the collection. The Hawley family has accomplished an astounding feat of preservation and continue to add to the exhibits. 

     Years ago, during a visit to the Arabia Museum, the late Greg Hawley told us that they still had several untouched wool overshirts in frozen storage. You can imagine how excited I was, when I later heard that several of the shirts were being carefully conserved and would soon be available for public view. and that the museum's conservator Dr. Judy Wright, had posted before, during and after pictures on Facebook. The shirt, now designated as the "Border Ruffian Shirt" is also featured in a Youtube teaser promoting David Hawley's future Preservation Series of film shorts.


Inside View of Neck Slit During Reconstruction
(note the gussets)
Image Courtesy of Steamboat Arabia Museum and
Dr. Judy Wright


     There were so many things to be discovered from  Dr. Wright's pictures. I was first struck by how casually the garment was constructed. I'm not sure if this represents "cheap" ready-made goods or what but it gave me cause to reflect on my previous replica shirts, with their tiny careful stitches. It appears that a running stitch was used for much of the construction and the seam allowances were just turned over once and left with the raw edge.  I also discovered  that the narrow braid trim only suggested a plastron with its outline. There was also an absence of underarm gussets in the original shirt. Another detail that caught my eye was the straight neck slit, rounded by the insertion of two small gussets at either end and no shape to the front of the slit. You will notice in the photo that opening down the front begins at the neck gusset. In the picture, the narrow, tapered facing hasn't been reattached yet. There appears to be no facing on the other side of the front slit as the edge is just turned back.

My Inspiration for the Latest Shirt
Image Courtesy John McWilliams

     Excitied about all of this new-found evidence, I decided to replicate another Miner's Overshirt incorporating some of these "details" I had just discovered.  True to my Gold Rush interest, I would base my shirt on an unpublished image of a young miner,shared with me, years ago by John McWilliams.

     I already had some madder red, wool flannel,  purchased from Burnley and Trowbridge.  I'm really glad that Needle and Thread of Gettysburg PA still carries the Wooded Hamlet line as they had a perfect narrow wool soutache, that I dyed a royal blue. Remember the "bright colored braid" in the REED cataloge description?  My wife is still my best source for small white china buttons, thank you very much Lindy.


My Replica

      Another thing worth noting in the Arabia shirt (and my replica), is that the front and back body are all one piece. This eliminates the need for a shoulder pieces to re-enforce a shoulder seam found with a two piece body.


Close-up Showing Faux Plastron ala Arabia
 and Patch Pockets
      The Arabia shirt's front slit-facing was quite narrow. At the top, it doesn't match with the end of the collar, leaving the collar end as an extended  tab. For my interpretation, I decided to have mine match, as you can see in the picture,


Slit Opened, Showing Tapered Facing
on the Left

    I also turned all of my seams twice to hide the raw edges, contrary to what the original shirt appears to have had. I felt the wool would contiue to unravel if it was left raw. Perhaps that wasn't a concern in the past. I did use a running stitch for the entire construction, even where I would have normally backstitched.


Small Gusset at Shoulder

    What I learned from this exercise was that maybe there is a place for simply constructed garments in the "Oh so carefully " reconstructed Living History world.  I'm not sure if the Arabia overshirt is typical or atypical but it taught me to think about historic shirts in a different way as there's always "new" information to be discovered.  My shirts will always be interpretations but hopefully reflective of a progressive approach to recreating history.

Close-up of Closed Neckline


Friday, November 16, 2012

Shedding a Little Light on a Favorite Subject

     I've been interested in early lighting devices for a very long time. Over the years, I've been lucky enough to find a few original pieces but I wouldn't claim to have a comprehensive collection. I recently decided to explore a few of the many styles of fluid lamps that existed just before the Age of Kerosene and blog on their use.


Original mid-19th Century Tinware Fluid Lamps
(not from my collection)
Image From Online Auction, Source Unknown

    As followers of my blog know, I love to practice my own version of experimental archaeology by reproducing past objects and learning from their use. For this fluid lamp exercise, I needed to put on my tinsmith hat and make a good effort with the minimal tools I have. If only I had a tinshop !


My Replica Lamps
Photos by Author 2012

     The key to learning about early to mid-19th century fluid lamps, is to study and understand their burners. Each type of  fuel needed a specific style of burner to give the best light. For this exercise, I wanted to explore Whale or Sperm Oil burners, Camphene or Burning Fluid burners, Lard Oil burners and Fat lamp burners. Even though some of these fuels are oblsolete, I wanted to faithfully replicate the burners, in order to understand how they evolved. For the time being, substitue fuels would have to do.


My Betty Lamp

     My quest started with the Betty Lamp. The classic Betty Lamp has an ancestry extending clear back to the Romans but had been improved on over time. The name "Betty" itself may have originated from the German word for "better". In this twilight period of its long history, it was still giving service as one of the humblest of lighting devices.


Nice Original Tinware Betty
Online Auction Source Unknown

     What I learned from my replica is that the wick channel has to be mounted to the inside bottom of the lamp only and not touch anywhere else. That way it transfers the heat of the flame down through the channel to the fat. By keeping the fat in a liquid state, it allows the wick to do its job.


Lid Open, Showing Wick Channel
On My Replica

      My lamp gave a constant, fairly bright light and wasn't smokey or smelly, even though the fuel I used was strained bacon fat. Maybe lesser quality fats gave the poor results that you read about. I think it's a great little lamp and will continue to use it.


My Whale Oil Lamp

     The Whale Oil lamp is probably the most recognizable lamp style that pre-dates kerosene. Whale Oil itself was the "first" commercially produced oil and was considered the premier fuel for illumination. This precious commodity was rendered from the blubber and parts of Baleen or other whales, whereas Sperm Oil was derived from the heads of Sperm Whales. Whale Oil wasn't cheap, running as much as $2 a gallon in the mid-1800's.

The Original Lamp
That Inspired My Replica
Online Auction Source Unknown


     The typical Whale Oil burner used vertical tubes that sometimes flared under their base mount and extended down towards the fuel. This extended length would transfer a little warmth to the fuel and help it to wick properly.

Whale Oil Lamp Burner
Note the Extended Tube


     Whale Oil burner tubes often have little slots cut in them, to help advance the wick with a pick. Most surviving original burners have two tubes but you do see singles. The rarest styles seem to be three and four tube burners. For my replica's pattern, I chose a Whale Oil  lamp version of a candle stick. The upright "candle" is actually the fuel reservoir, which extends into the base. To one side of the base is a matchsafe with a striker lid. Way cool !!

My Lard Oil Lamp
Note the Wick Pick on Chain


     Next in line is the Lard or Lard Oil Lamp, which in its time, was a cost-effective alternative to the Whale Oil lamp. Lard "Oil" was expressed from solid lard, but still needed to be warmed, to improve its fluidity. This need gave rise to many patented varietys of burners, each intent on improving the efficiency of the fuel. For my replica, I  made a version of  Archer's Patented Burner of 1842.

The Original Archer Type Burner
That Inspired My Replica
Image Courtesy The Old Time Lamp Shop


      A copper tube, mounted between the two flat burner tubes, transfers the heat all the way to the bottom of the reservoir. Many times you will see Lard Oil lamps mis-identified as Whale Oil lamps. The clue to their identity, is in the extended burner design.


My Replica Lard Oil Burner
Based on Archer's Patent


      For my replica, I ended up using canola oil as a substitue fuel.  I tried using solid Lard but it didn't work very well. Lard oil is a little hard to find, even though it's occasionally used by machinists as a lubricant. Just for fun, I painted the lamp with asphaltum varnish, a typical finish on tinware of the period.


My Camphene Lamp
Note the Burner Caps on Chains

     The final lamp in this project is the Camphene or Burning Fluid Lamp. Camphene was the rectified oil of turpentine and was sometimes mixed with alcohol to make lamp fuel. Although Camphene gave a cheap bright light, it came with a risk. It was very explosive and needed a specifically designed burner. Camphene burners have long tapered tubes that when in sets, angle out from each other to dissipate the heat of the flame.
My Camphene Burner

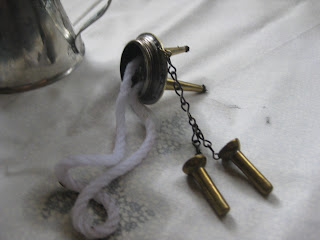
      These tubes never extend down past the mounting plate and  never have slots for wick adjustment. Apparently, any heat added to the fuel caused an accumulation of gases and the possibility of an explosion. Yikes !! Most surviving original burners have little covers to snuff out the flame and keep the fuel from evaporating. The style of lamp I chose to replicate is sometimes called a petticoat lamp by collectors for the flared shape of the base. Camphene lamps are often mislabeled as Whale Oil lamps but the difference is obvious once you know your burners. In case you wondered, my lamp burns modern lamp oil as I don't need to kill myself in the pursuit of history.


A Classic Original Camphene Lamp
Online Image Source Unknown

     By the time of the Civil War, all of these fluid lamps were fading from the scene, as the Age of Kerosene began . Untold numbers of patented burner improvements would help make this "new" cheap fuel the most popular choice in the world. It's still the dependable choice I make every time we have one of our routine power outages but after this lamp project, that fat burning Betty Lamp is looking pretty sweet.

For more information on early lighting, I would suggest these great sites:

                      The Rushlight Club has been supporting the serious study early lighting
                        forever

                       James and Beth Boyle have a lot of great info on their Rams Horn Studio
                          site

                       The Old Time Lamp Shop has a lot of great photos of rare lamps and well
                       worth the visit


Wednesday, November 14, 2012

Carpentry Tools Revisited or Picking Up Where I Left Off

    Once apon a time, I felt inspired to craft my own set of traditional carpenter's tools. I'm not sure how far I expected to go with that notion but for some reason, my ambitions got the better of me. The sum total of my production ended up being one Jack Plane. It turned out to be a good project though, as that plane became a learning tool, every time I used it.

     The plane project started with the purchase of the book "How to Make Wooden Planes" by David Perch and Leonard Lee (of Lee Valley Tools). After springing for a good thick steel from Garrett Wade., I picked up a nice block of hard maple and went to work. One of the advantages of crafting your own plane, is that you can custom fit the Toat to your hand. I discovered that a comfortable fit contributed to overall performance. The only flaw in my plane was its propensity to clog at the Mouth. I finally solved that problem by reducing the opening with an inset piece.


My Jack Plane
Photos by Author

     Since it now appears I'm back in the Traditonal Carpentry game, I felt compelled to revisit that "craft your own tools" notion of a decade ago. All I needed was a little inspiration. The blogging world is a great place to find inspiration and mine came from the Frontier Carpenter Blog.. Ron had posted on a sweet replica he made of an original 19th century wooden brace. Lucky for him, he owns the original and could make a carbon copy. I'm not so lucky but his work convinced me that I wanted to make my own brace.

Ron's nicely done copy
Image courtesy the Frontier Carpenter blog

      Some of my tool books feature original examples of braces, from the very primitive to plated Sheffields, but nothing really grabbed me until I started  researching online. In the Crafts of New Jersey publication called the "Tool Shed", Issue 93 of Sept. 1996, I found an article by Ron Pearson called The Primitve Wooden Brace. In the article, several varietys of wooden braces are categorized by the author according to how the bits mount. After studying the photos in the article, I felt I had enough information to design and build my own version of this classic early tool.


A beautiful brace featured in the article

    The project started with the purchase of a nice block of maple from the Wood Workers Source and after the final shaping, lathe work and sanding, I decided to stain the brace to resemble a more expensive wood. To me, it made it feel a little less "primitive". From an online auction, I scored 3 original bits, then mounted them in their newly turned pads. I liked the idea of a thumbscrew to secure the square shaft of the pad but gave it my own spin with a brass plate mount. I was very pleased with the way it turned out and decided to keep the ball rolling by crafting a few more "necessary" tools.


My Version of a Mid-19th Century Brace

     When I retired from the Columbia Carpenter's Shop in 2008, I sold all of my Crown Tool replicas to a docent / carpenter. To make up for that loss, I decided to craft my own try square, mortise gauge and bevel from scraps of hardwood I had accumulated. The patterns for the three tools came from online sources like Google Images and my reference books.


My Gauge, Bevel and Try Square
Ready for Work !

     . For the moment my tool urge seens satisfied but that could change as we continue to develop the new interpretive Carpenter's Shop at the Angels Camp Museum.  So, stay tuned !