Hello and welcome to my blog. What I'm doing here is documenting my personal expression of "hands-on history" from a craftsman's perspective. I've been on this path for a large part of my life and it's taken me to some interesting and challenging places. I hope to share the processes and the historically inspired objects I've crafted along this journey into our past. This adventure has deepened my appreciation for past craftsmanship and the intelligence of common place things in Early America. Besides, now I have all this cool stuff to play (teach) with.


Jim Miller


Monday, November 18, 2013

Eureka Moments Revisited, Part 9, How They Turned a Washbowl Into a Gold Pan

    Way back in January of 1999, I purchased a copy of "At the Extremity of Civilization" by Israel Shipman Pelton Lord.  Lord's diary turned out to be one of the most descriptive and detailed accounts of the overland journey to California and life in the gold fields I had ever read.. His meticulous observations and recorded details of a classic Gold Rush cradle, enabled me to build the authentic recreation that I blogged about in Feb. 2012 ( Eureka Moments Revisited Part 3, A Divine Project or "The Lord's Cradle"). The following story is about something else but the credit for inspiring it goes to Lord and his drive to document the details of his experience.

     In Appendix C, on page 429 of the book, there is a crude sketch and accompanying description.

 "Round pointed shovels, light and strong, light steel picks and strong tin pans holding about 2 gallons are in most demand. The tin wants to be of the heaviest kind. When made on purpose a strip of tin about an inch wide and made convex outward is soldered under the rim or wire on the outside making a smooth round projection to take hold of. Imagine this fragment of a pan in diagram ( Lord's reference to his sketch, seen below ) to be bottom side upward you can see the roll of tin on the outside. Such pans bring 6 dollars here, plain ones 5, old worn, bruised light ones 3 1/2 to 4."

Lord's sketch


     When I first read this back in 1999, I wasn't quite sure what Lord was describing having never seen an actual example of this style of pan. I didn't think much more about it until my friends Nick Kane and Jon McCabe discovered physical evidence of these pans while metal detecting for Gold Rush relics.

African American Gold Miner with His Long Tom
 Gold Pan to the Right

Image Courtesy Museum of African Diaspora


     One of the primary resources for Gold Rush material culture study is the incredible  photographic record that has survived. As these pans gained our interest, we wondered if there were any images of them in use ? You know the old saying, once you know what you are looking at, things start popping up. Right there in one of the most published Gold Rush daguerreotypes, was the pan of interest.

Detail of Pan from Above Image
Note the Roll under the Edge


    Some time later, another amazing image surfaced as the perfect document of this "improved" wash bowl / gold pan.

A Truly Remarkable Portrait of a Gold Miner
 There's That Gold Pan !
 
Image Courtesy Treasurenet
 

   My friend Nick sent me this illustration by contemporary artist Charles Christian Nahl, which  appears to depict the pan. Nahl is well known for his accurate portrayals of Gold Rush life and was one of the most prolific artists of the period.

Nahl illustration courtesy of Nick Kane

     What more could I want ? It took awhile but I finally decided that the time had come for me to make a replica of this pan. My friend Jon McCabe gets the credit for recreating the first one though.

Original Pan with Remnants of the Shaped Ring
Images Courtesy Jon McCabe


     Jon copied his original 5 section, pieced pan shown above. It was recovered from a mining camp site on one of his metal detecting adventures.


    Here's another view that show the remaining sections of the original pan.


    And another closer view.

Jon's Reconstructed Pan
Inside View


     He was also fortunate to have a neighbor create a die which helped him form the curved sections needed.


Outside Bottom View Showing the Ring


     Jon's example gets the prize for most authentic and as such now resides in the El Dorado County Historical Museum. Great job McCabe !!

View of the Ring from the Side


     Eons ago, I made a historic style, pieced pan using an original 4 section wash bowl that I own for the pattern. It is 15" in diameter and about 3 1/4" deep and made from unplated sheet steel. It holds 2 gallons exactly as Lord described.  I've even used it for recreational panning over the years and discovered that my hands would tire from holding the narrow rim. When you consider that a good panner needed to wash about 40 - 50 pans a day, any improvement in comfort would have been welcome.


    I decided to use this existing pan and alter it to recreate the "improvement".After some experimentation, I finally arrived at a pattern for the convex sections. The hardest part was the compound curves, as the pieces have to fit two different arches, while resting on the tapered side of the pan.

My Version of the Pan


   Without an original example to copy, my version would be an impression at best but still faithful to the historic pattern. I formed the pieces over a curved piece of 3/4" pipe using a rawhide mallet. It took some stretching to form the compound curves. Eventually the sections were soldered in place on the bottom edge only, as they tucked neatly under the rim. Jon McCabe informed me that on one of the relic pans he studied, the wire was absent from the rim entirely.

Another view


    When my pan was finally finished the best part was taking it into the field and using it. With the pan loaded  with water and material, it is noticeably easier to "take hold of" as Lord described. I love it ! History you can get a grip on.
    

Saturday, October 12, 2013

Eureka Moments Revisited, Part 8, Amazing Feats of Levitation or How Ancient Technology Met Gold Rush Challenges

        I've always found it curious that very few "new" placer mining techniques came out of the California Gold Rush. The reinvention and application of existing and often ancient technologies was apparently the norm. It makes perfect sense when you consider the diversity of the mining population with its collective world-wide experience suddenly faced with new challenges in California.
That pool of knowledge would provide the curriculum for this new " School of Mining".

Classic California Gold Rush
River Mining Scene
Note the paddle wheel and pump in the foreground

Image courtesy examiner.com

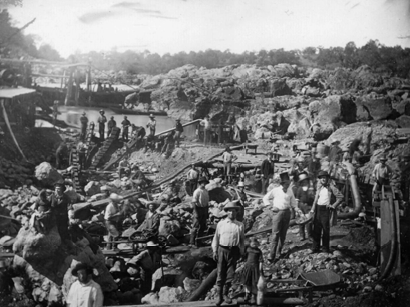
        Sometimes the pooling process led to daringly large scale operations like river mining, where entire water courses were diverted into artificial channels for miles and miles. To keep those exposed river bottoms dry and mineable, long chain pumps worked furiously, powered by enormous paddle wheels driven by the captured river. Putting water to work was a key element in effective placer mining at all levels in the 1850's.


Daguerreotype of River Mining
Note the wheels (background) driving pumps
in the left foreground of the picture

Image courtesy publishing.cdlib.org

      Jumping forward to the mid 1990's, this whole water management issue in the Gold Rush got me thinking. The surviving historical evidence suggests that  miners often exploited some sort of pumping device to support their appetite for water, or to mitigate a problem with water. Once you know what you are looking at, you start to see these pumps all over the place in early images. When water needed to be lifted to flown, these simple devices could feed Long Toms, Quick Silver Machines and Rockers. I decided to research the three most common pumps used and make replicas for my living history placer mining demonstrations.

      I chose the simple siphon pump for replication first, then I built a flutter wheel and finished the project 6 years later with a chain pump. Initially, I gathered as much primary research material as I could find, mostly images and some brief accounts until thanks to my friend Larry Baumgardner, I discovered the "Descriptive and Historical Account of Hydraulic and Other Machines for Raising Water" by Thomas Ewbank. Published in 1842, it has it all, including the history of my focus machines. There is no doubt this text guided some of those original Argonaut / Engineers in their creations.

Detail from Gold Rush Daguerreotype
Showing a Miner Working a Tall Siphon Pump

Image source unknown


       Most of the original images of siphon pumps suggest a hollow log was used for the main body with a rude handle and plunger mounted to pivot at the upper end. Ewbank shows and describes a Sailor's bilge pump that incorporates a leather cone on the inside, fixed to the plunger, point down. On the down stroke, the cone collapses into the water. On the up stroke, the cone fills with water and swells to meet the inside of the hollow tube. This way the water is lifted up and eventually exits up the tube. This simple pump goes back as far as ancient Greek and Roman mariners, who used it to manage unwanted water in their ships.


From Ewbank, pg. 215


      Ewbank also illustrated a more sophisticated liquor pump that incorporated two flapper valves to isolate and lift the fluid. In my earlier research I had decided on this dual valve idea although I now feel the simpler Sailor's version might have been more commonly used.


My Replica Siphon Pump and Long Tom on the American River, 1997
 Left to Right, Bill Dunniway
Derek Manov and Floyd Oydegaard

Photo by Lindy Dubner


      For my log body, I purchased a large peeled log and sawed it lengthwise in half. Once halved, I hollowed out each side and eventually wired the log back together around the mechanism. I cheated a little on authenticity by opting for modern abs fittings and aluminum for my valve parts. Since none of the mechanics were visible, the interpretive value as a recreation wasn't compromised. The pump proved itself but never really delivered the volume of water I expected.


Original Gold Rush Letter Sheet Illustration
Depicting a Noria (aka flutterwheel) Lifting Water to a Long Tom

Image courtesy westernbitters.com


     Part 2 of this water lifting exercise, was to design and build a flutter wheel or Noria. Used in ancient Egypt, Rome and China, this wheel depended on a good flow of water from below in order to function properly. In the form I chose to copy, large paddles are needed to engage the moving water and attached boxes do the work of lifting the water. If the current is strong enough, the boxes lift and deposit their contents into an elevated flume or trough as the wheel turns (see above).


My Replica Noria / Flutterwheel
on the American River 1999

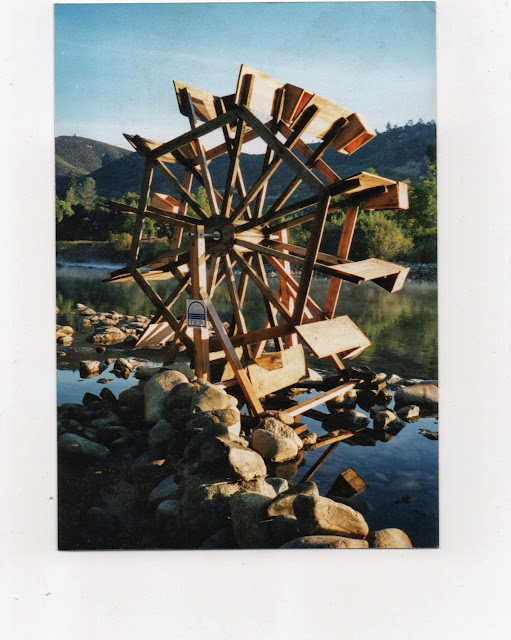
    When I designed my replica wheel, I had to take into account how I was going to transport it to any living history events. I'm sure that most of the originals were built in place but for me, that wasn't a choice. I ended up building it in sections that could be bolted together on site. The wheel was an imposing 10 feet in diameter and taller yet when cradled in its moorings .


 Nice Arty Shot of My Replica Wheel
at the Sesquicentennial of the California Gold Rush
Coloma California Jan. 24, 1998

Image courtesy the Modesto Bee


     This was quite a learning experience as I quickly found out that a strong current or fall of water was essential to even move the wheel, let alone fill the boxes. Sorry to say, it never met its full potential on the slow moving American River (seen above) but kicked butt on the swift Tuolumne River later that year at a movie shoot. It had a very brief but illustrious part in an educational film from Cambria Productions called "Fountains of Columbia".


Various Forms of Chain Pumps from Tiagong Kaiwu
Chinese Encyclopedia 1637

Image courtesy wikipedia


       For the final part of this quest, I turned my attention to the chain pump. Originating in China, it found widespread use in California and appears in numerous images of the time. Some examples appear to be quite long, especially when used in river mining operations as I mentioned at the beginning of this posting.


Original Daguerreotype Showing Multiple Chain Pumps in Use
( left center of the image)

Image source unknown


       I first gained insight into how these simple but efficient pumps worked by studying the diagrams in "Gold Mining in Siskiyou County 1850-1900, Occasional Paper No.2" by Gary D. Stumpf. What's involved is a long box or tube with round drums mounted at each end. The upper drum has a large crank or cranks to turn it. A continual belt runs over the drums and through the long box. Spaced along this belt are paddles sized a little smaller than the interior dimension of the box.


My Replica Chinese Chain Pump
Kid Powered on the American River

My friend Jon McCabe in the middle.


     Here's how it functions, with the lower end in the water you crank the upper drum and engage the belt in a forward motion towards the water. At the lower end the paddles drive the water into the box and drag it up the tube to exit at the upper end. Even if the water leaks back, the next paddle in line catches it and moves it forward.


The Pump at Work at Columbia SHP During the Annual
Columbia Diggin's Living History Event 2010

Ian McWherter in the foreground


    What I discovered during the designing process of my replica was the critical part drum fabrication and mounting played in the pump's function. The belt needs to track evenly as it enters the box, otherwise it will bind and wear out early. Quite by accident I chose the best fabric for the belt. Hemp canvas shrinks a little when wet and this kept the belt tight while running in the water. I had to assume that the paddles had some sort of backing in the way they were mounted upright, so I used steel straps on the opposite side of the belt when I nailed them in place. It worked like a charm !


     You might have seen the pump in action in "Save Our History" series from The History Channel. It was used in the "Gold Rush Ghost Towns" episode ( Season 1, episode 30). My friend and fellow historian Nicholas Kane and I taught host Steve Thomas about early placer mining one chilly morning on the Mokelumne River in 2005.
 
    Or you can check out this YouTube short I just discovered. Just click on the link below.

http://www.youtube.com/watch?v=RLlnFPsw7lI

    From my experience with the three pump, I have to say, hands-down my favorite is the chain pump. It has the interactive option when engaging the public (kids love it !) and it pumps water like crazy. All in all this was a great project and learning experience beside being just plain fun. Thanks for looking.


Saturday, September 28, 2013

More Reconstructed History as 19th Century Baitquest Continues

         My adventure into mid-19th century artificial baits continues with a focus on critters that hop.  In his 1849 edition of "The American Angler's Guide or Complete Fisher's Manual for the United States", John J. Brown makes several references to the use of artificial frogs and grasshoppers as bait. He even  kindly provided engravings of said baits in his book.  Brown was also an established  tackle dealer in New York and advertised that he carried faux frogs and hoppers so their availability is not in doubt.

Brown's Artificial Frog Bait
from 1849
Note the position of the two hooks

     To my eye though, Brown's depictions seem closer to nature than what the actual baits might have looked like.  I thought it would be a good challenge to reconstruct these baits using period materials and from what I could gather, period techniques.

Brown's Grasshopper Bait
Note the one hook and how the line
exits the head


      While researching this subject I discovered the work of Louis Rhead,  a successful and well respected artist in the late 1800's and early 20th century.  What caught my attention was his work as a devoted and published angler. Late in life he wrote the "Fisherman's Lures and Game Fish Food" which has oodles of info on his work as a tackle maker.


Frog "How-to-do" from Rhead's
"Fisherman's Lures and Game Fish Food"
Image Courtesy Chest of Books
 

      In this book Rhead kindly shares details of how he made many of his nature baits, including frogs and grasshoppers. His complete descriptions including materials, sketches and photographs encouraged me to consider this resource as the best chance for my project to proceed.

Original Rhead Frog
Image Courtesy Lang's Auctions


      Although of a later period, the handmade nature of Rhead's baits continued the crafting tradition, so evident in surviving early tackle. Besides, I haven't been able to locate any documented artificial frogs or grasshoppers from the mid 1800's so this reconstruction will have to stand on its own merits.

     For my version of Brown's 1849 Frog Bait, I chose cork as my material and Rhead's technique of wrapping the body parts with brass wire.  Aware of the fact that an actual bait should survive numerous strikes, I made sure my design was literally "wired together". For hands and feet, I used hemp cord, wrapped with fine copper wire.


    Here you have the first parts coming together with the two hooks imbedded in the thighs and anchored to the front loop (barely visible).


    More parts are added and it starts to look like something.


    Underbelly view showing the front legs in place before lower body was wired on.


     Finished, painted and ready for Mr. Bass' last meal. I think today's collectors might call this a "Folk Art" frog.


     Part two of this project, the reconstruction of a mid-19th century artificial grasshopper bait, started with research. Some time ago I had discovered several "vintage" hoppers that caught my attention as nicely crafted deceivers.  Built around a single hook, they all appeared to have wrapped cork or wooden bodies and quill wings and legs.

Vintage Grasshopper Bait

Image Courtesy Online Auction


    Two of these vintage grasshopper lures used a bent feather spline to suggest both back legs and antennas, which is pretty sweet (see above). In contrast, Louis Rhead tied his rear leg splines to the bend in the hook for a more realistic pose (see below). Who knows what mid-19th century tackle-crafters used or did exactly, so for my recreations I decided to try both ways.

Louis Rhead Grasshopper Baits

Image Courtesy Lang's Auctions

A Very Green Circa 1900 Hopper
from the UK

Image Courtesy Online Auction
 

      One exceptional turn-of-the century hopper showed up on an online auction from the UK. It appears to have legs (at least in part) made of green painted cordage. Maybe I'll try that on the next example I fabricate.

My Take on a Mid-19th Century Grasshopper Bait

Upper version built around a spade-end hook I made
tied to a plaited horsehair snood.

Lower version ala Rhead with a horsehair eye tied on
an antique #26 Mustad blind eye hook. 
Grouse wing quills and tips used on both.


Thanks for looking !


Saturday, September 14, 2013

In Search of Spinning Caterpillars and Spoon Minnows, 19th Century Angling Redux


    As my journey to recreate early angling implements continues, I'm often reminded of the mysterious origins of some of today's tackle. Take lures as a good example.  Known in the 19th century as "artificial baits", some historians believe that early American anglers avoided them in favor of natural baits. I've also read that a change in attitude didn't come about until American tackle manufacturers like Julio Buel started marketing artificial baits after 1848. One popular story has it  that Buel came up with the idea of a spoon bait after witnessing how a fish responded to a teaspoon accidentally dropped in the water.  Some have him making spoon baits for friends as early as the 1820's after his serendipitous discovery.

First American Patented Lure
J.T. Buel's Arrowhead Spinner
April 6, 1852

     Even though it's popular to assume the spoon is 100% American,  I think there's a possibility it  may have been sprung from different locations around the same time.  Some contemporary literature suggests it came out of Sweden early in the 19th century (see "The Fisherman's Magazine and Review", Jan. - Oct. 1865, Vol. 2, Chapter XIII).

    Contemporary evidence also suggests that American anglers were, at least to some degree, using available British baits before the introduction of domestic patented baits in the early to mid- 1850's. The focus of  this post will be the British spinning caterpillar bait known as the "Kill Devil" and the earliest form of an "American" spoon bait that I could find.

   My introduction to the Kill Devil aka the Artificial Caterpillar, came from an illustration in the 1823 edition of T.F.Salter's "The Angler's Guide", seen below as number five.


Illustration from Salter's 1823
The Angler's Guide
  

   It gets even better, as Salter goes on to describe in detail (see below) how the Devil is made, suggesting that these baits may have been homegrown as well as a commercial product..


Note the use of leather for the body and the way
it's shaped, with the tail downward.


          As I continued my research, I discovered additional information on this bait in John Jay Brown's "The American Angler's Guide or Complete Fisher's Manual for the United States" 1849 edition. In Chapter XXXII on page 327, Brown writes, " An artificial bait called a Kill-devil, which has been in use a number of years in England, has been proven successful with some of our sportsmen, in trolling for trout or pike. In appearance it is similar to a caterpillar: the body is composed of coarse thread windings finished over with the most gaudy silk colors and wound with silver tinsel: the hooks, numbering seven, are arranged according to the usual minnow rigging; the tail is composed of tin or bright metal, split up or bent at an angle, to insure swift spinning. They are made strong and durable, and their cost is trifling: they are worth a trial."


From Brown's 1849 The American Angler's Guide
Page 318


      Brown included this  illustration of the Kill-devil and although similar to Salter's it lacks the intentionally curved body and resembles a minnow bait more or less.


     I decided there was enough information to create my version of a Kill-devil bait. For my example I chose kid leather for the body and tin for the tail. In order to produce the curved form of the body, I experimented with various patterns until I could roll the leather up into the desired shape.


     My plan was to glue and then sew the leather edges down secure. It would have been easier to make a straight body with an internal wire armature but I like the idea of a softer, more natural body for Mr. Fishy to chomp..


     Once the body was sewn, painted and the tail attached, I crafted a brass wire staple/loop for the front. An antique box swivel was added before I crimped the staple into the leather.

My Replica Kill-devil #1


     All that was left was to wrap the tinsel and rig the hooks. For the tinsel, I used waxed silk thread  first, to get the pattern and then followed with the more fragile tinsel.

    For the hooks, I bound blind-eye hooks into two doubles and one treble (the requisite seven hooks), all tied with silk thread onto plaited horse hair lines.


My Replica Kill-devil #2

    I was pleased enough with the way it turned out, that I made another one in red. Seen here next to Salter's original illustration. These baits haven't had their chance to kill any fish yet but I did take them out and drag them through a running stream to check their action. I discovered that the bent shape is an important factor in making them spin. In fact, they spin like crazy and with all those hooks flying, they have to snag a strike.

   The next project was to recreate an early Yankee spoon bait. Even though the spoon idea is often credited to Julio T. Buel,  his first patent of  April 6, 1852 is not really for a spoon but rather a spinning bait, know to collectors as the arrowhead spinner. In the text of the patent, Buel  states, "I do not claim what is called a spoon minnow .....these having been used before." We may never known whether he got the idea of a spoon from one dropped in the water but he was likely making spoon baits when he opened for business in 1848. Evidence suggests that maybe others were making them as well.

    In Brown's 1849 "The American Angler's Guide", Chapter VII on Spoon Baits, he states, "It was first invented and used by a gentleman in the vicinity of Saratoga Lake for Black Basse." Brown goes on to describe how this unnamed gentleman altered a spoon bowl by adding a swivel at one end and then soldered a pair of hooks to the concave side on the other end, after cutting off the point of the spoon.  I wondered, is this the earliest American spoon bait ? Was the "gentleman" Buel ?


Spoon Bait Illustration from Brown's
1849 American Angler's Guide

Note the watch stem swivel


     Brown continues, " It has since been made-up in various styles, with one two and three hooks and is made with silver plate or brass on the convex side, and painted red (decidedly the best color) on the concave."


My Replica

Concave side painted


    For my replica version of this early spoon, I cut out the shape from nickel silver sheet stock and then pounded out the form. I could only guess how the watch stem swivel worked but it seemed to have turned out fine. The hooks were made from hook wire I purchased from Paul Jones of Historic Angling Enterprises. A great source by the way for early angling material and information. After soldering the hooks in place, as in the illustration, I painted the inside with red enamel.

     I think this first spoon turned out well but I'm going to make up some smaller versions to fish with. Who knows if this is truly the "first" spoon bait but it's undeniably primitive next to what came later. All in all, both were fun projects. Thanks for looking and I always appreciate your comments.


Monday, September 2, 2013

Explorations into 19th Century Angling Continues With Fly Books and Boxes

     This post revisits and explores some of the ways 19th century anglers stored their flies and leaders (or casts, as the English call them) when stream side. One popular choice was a "fly book", which in the earliest versions, was a small, bound book with pages specifically designed to secure snelled flies, like the one Mr. Akerman is holding.

Frontpiece from John Yonge Akerman's
"Spring-tide" 1850

Is that a Fly Book or a Fly Box
Under That Elbow?

     The pages of these fly books were natural parchment skin, fashioned into little envelopes or pockets for the flies to slip into. These pockets were created by folding the parchment back on to itself and then creasing the folds into flat, deep loops. The folds were then held in place by stitching along the outer edges of the page, often in blue thread.

       In an attempt to avoid crushing the flies and allow air to circulate, small discs of cork or thick leather were sometimes glued into the outermost corners of the pages as spacers. Besides the pockets, you will see strips of ribbon or parchment mounted through slots in single pages, to secure coiled bits of line or snelled flies.

Original 1820's Fly Book

Image Courtesy Mullock's Auctions

    The earliest surviving example of a fly book I've found was featured at a Mullock's Auction in the UK. They called it a wallet but I'll talk about that later. Attributed to the early English tackle maker Onesimus Utonson, it's literally a small book with marbled board covers and parchment pages. This extremely rare book was protected by a fitted leather slip-cover that was secured with long ribbon ties. A similar example turned up at an Angling Auctions sale (also across the pond) and was inscribed with a date from the 1820's. Very cool ! Unfortunately, none of the auction pictures revealed the design of the pages but from the description it appear that they are envelope style.

Leather Bound Fly Book
Showing Parchment Leaves and Corner Spacers

(note the sweet fly tying clamp)

Image Courtesy Mullock's Auctions


     It appears that in the mid-1800's, manufacturers began to shy away from the stiff covers and create more durable leather-bound versions. Even the early style ribbon ties would eventually give way to a sensible strap and buckle. Sometime during this inevitable evolution, the fly book became known as  the fly wallet in contemporary literature. Today it seems the terms fly book and fly wallet are interchangeable.

Another Early Fly Book
With the Owner's Notations

Gotta keep track of those killing patterns !
Image Source Unknown


     In order for me to craft a rational ( and affordable !) replica of a fly book, I had to get over the notion of using actual parchment skin for the pages (I can only wish). What I ended up using  ( warning for the purists, get ready to cringe ) was the modern material known as Tyvek. Tyvek is a non-woven polyethylene fabric that has many modern applications. After I lightly coated some pieces with thinned orange shellac, it looked and felt similar to real parchment. Luckily I found a ready source for this modern fabric in Tyvek shipping envelopes.

My Replica Fly Book
with Linen Tape Ties

Pictures by author

     Once I decided on a pattern for the cover, I cut out the pieces from scrap leather left over from earlier projects. Black calf on the outside, sandwiched with dark brown for the lining, gave it an nice look. From my experience with bookbinding and what I could gather from photographs of originals, the parchment pages of these little creations were sewn into signatures or groupings,  just like real books.


Note the Cork Spacers
and Stitched Edges of my
Faux Parchment

    I also discovered that on some original fly books, the parchment pages were  interspersed with felt or wool pages. These were probably intended to help dry the wet flies as they were returned to the book. My final design called for five, double-sided pocket pages, six blank pages and two wool pages.

My Tools of the Trade


    Many examples of fly books also include a place for the requisite tools of an angler. For me that would be tiny scissors, tweezers and an awl to open knots. On the other inside cover, I designed a expandable pocket for extra line etc.. As you can see, my book has already provided faithful service and will continue to do so. On to the next project.


Original 1860's Fly Box on the Right
Together with an Early Fly Book

Image Courtesy Angling Auctions


    The second half of this post is on "fly boxes", a form more familiar to today's fly fisherman than those antiquated book things. I was curious  how far back boxes go into the misty past of tackle history. Fly books served the angler well when he was fishing wets, as flattened flies aren't too much of a problem. Is it possible that boxes arrived to keep up with the increased interest in dry fly fishing and the need to keep the flies neat ? I'll leave that one to the experts. The earliest example of a fly box  I've discovered is from the 1860's according to the auction specialists who sold it.

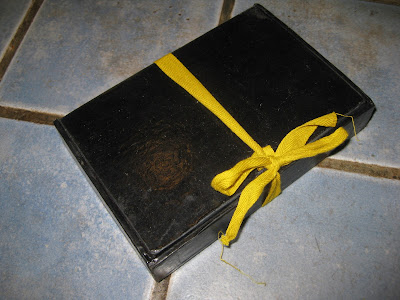
My Fly Box Closed
Nice Ties Eh ?
.

    The idea of creating my own version of this early box seemed very doable thanks to its simple design and a good photo to work from. The original is described as made of leather covered cardboard. For mine, I chose painted cloth over book board as a slightly cheaper version. If you study the picture of the original, it's easy to see how one side of the box hinged into the other. Pretty darn cool !

Interior View

Notice how the cork panel on the right is smaller
to allow the box halves to seat inside each other


     One of the things I loved about this rare survivor, was the cork interior. A simple, classic and effective solution to fixing the hooks. I had trouble finding 1/4" thick natural cork sheets so I opted for modern crushed cork sheeting that still has a good look and function. I think it turned out great and my flies like it too.  I would recommend making this style fly box just for the fun and affordability of it. Fish on !!

                                                            Thanks for looking !
     .